Introduction
How to Replace Xbox One Joystick: The Xbox One controller is a finely tuned device, designed to elevate your gaming experience to new heights. One of the key components of this controller is the joystick, which plays a pivotal role in how you interact with your games.

However, like any piece of hardware, it can wear out over time or develop issues. This article will guide you through the process of replacing the joystick on your Xbox One controller, ensuring that your gaming experience remains top-notch.
Just as a well-oiled machine delivers optimal performance, a functional joystick ensures the best possible gaming experience on your Xbox One console.
Whether it’s navigating through the gaming world, aiming at enemies, or controlling your player’s movements, a fully operational joystick is crucial. However, a faulty joystick can become a sore point and hinder your gaming prowess.
When it comes to replacing your Xbox One joystick, it’s important to have a good understanding of the joystick itself.
The joystick is not just a simple stick; it consists of various components such as sensors, springs, and mechanical parts that work together to interpret your physical movements into in-game actions.
By understanding these parts, you can make the replacement process easier and also diagnose any future issues that may arise.
Some common issues that may necessitate a joystick replacement include drifting, where the joystick moves without any input from you, or stickiness, where the joystick doesn’t return to its neutral position.
These issues can greatly affect your in-game performance, leading to frustration and a less-than-ideal gaming experience. By replacing the joystick, you can restore the functionality of your controller and enjoy a seamless gaming experience once again.[How to Replace Xbox One Joystick]
Preparing for Joystick Replacement
Before embarking on the replacement process, there are a few essential tools that you will need to gather. These include a T8 Torx security screwdriver, a pry tool, and a replacement joystick module.
Having these tools on hand will ensure a smooth process and prevent any unnecessary delays.
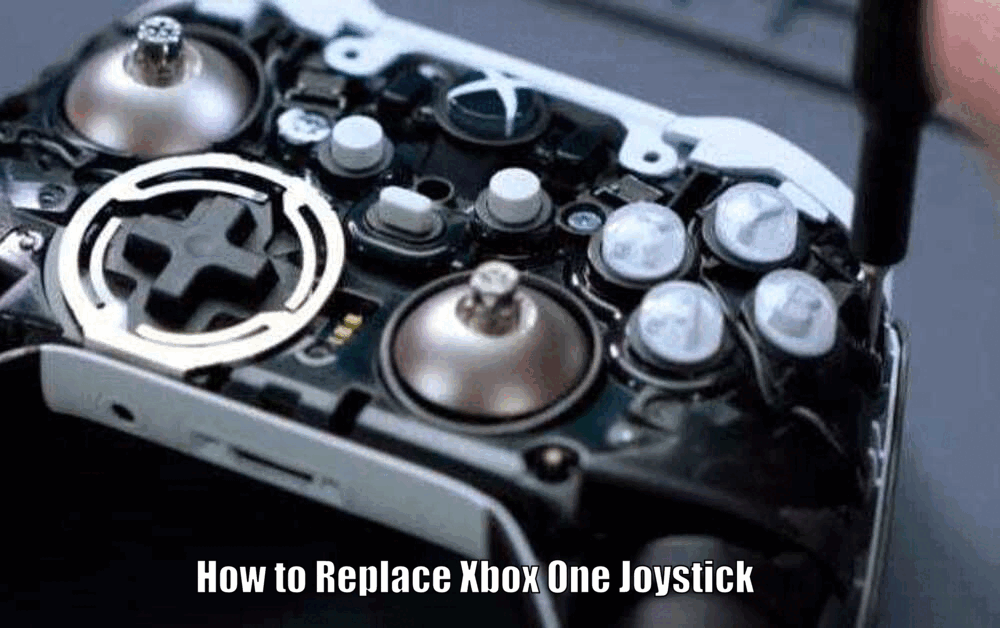
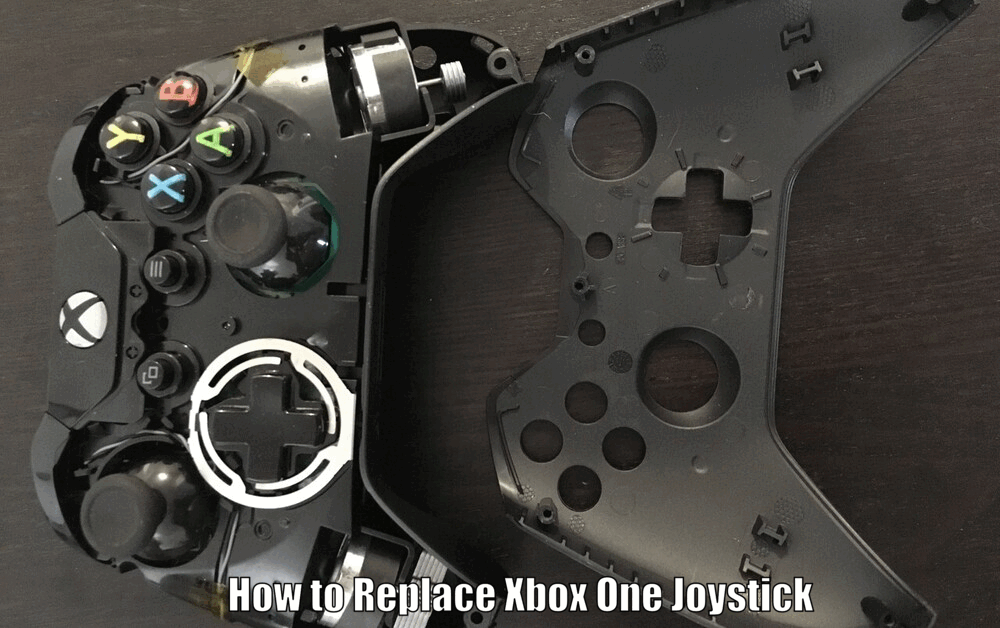
To begin the replacement process, you will first need to disassemble your controller. Start by removing the batteries and the side grips.
Once that is done, you can proceed to unscrew the five security screws on the back of the controller. With the screws removed, carefully lift the faceplate to expose the joystick module.

Removing the Old Joystick
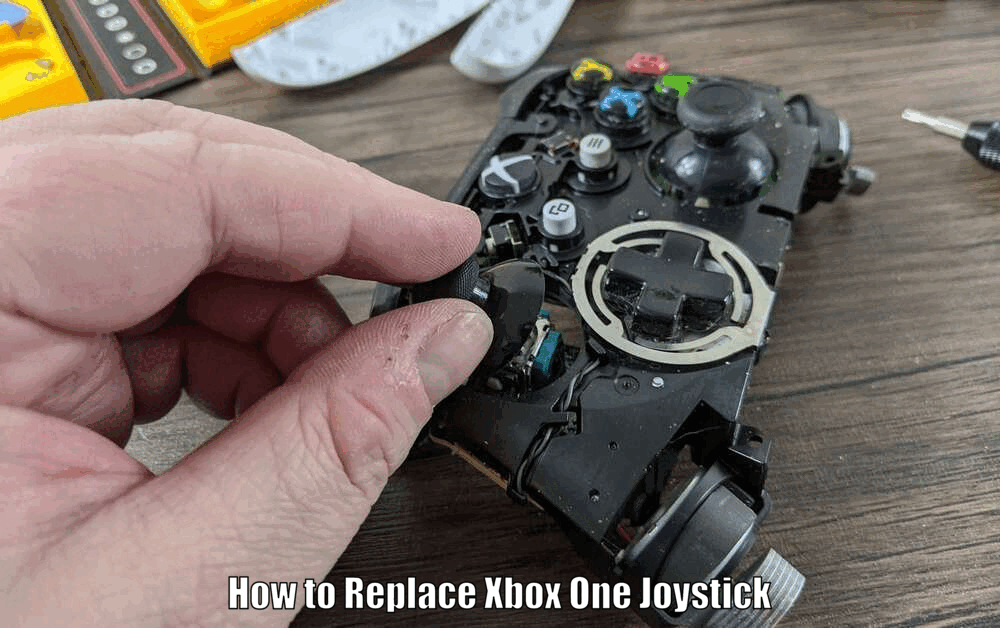
With the controller disassembled, you can now proceed to remove the old joystick. To do this, unscrew the module and gently lift it off the controller. It’s important to be cautious during this step to avoid damaging any surrounding components, as this could potentially lead to additional issues.
Read Also How to Fix Joystick on Xbox One Controller Free Method ⬅️
During the removal process, you may encounter challenges such as a stuck module or stripped screws. If you encounter these issues, you can try applying a little more force or using a larger screwdriver.
However, it’s crucial to always exercise caution and ensure that you don’t damage other parts of the controller in the process.[How to Replace Xbox One Joystick]
Installing the New Joystick
Now that you have successfully removed the old joystick, it’s time to install the new one. Carefully place the new joystick module in the slot and secure it with the screw.
Make sure that the new joystick is snugly fit and not wobbling, as this could potentially affect its functionality.
To ensure a successful installation process, take your time and make sure that the joystick is sitting correctly in its designated slot.
A secure and functional fit will guarantee optimal performance and longevity of your controller, allowing you to enjoy uninterrupted gaming sessions.

Reassembling the Controller
With the new joystick installed, it’s time to reassemble the controller. Begin by placing the faceplate back onto the controller and screwing it back together. It’s important to exercise caution and not over-tighten the screws, as this could result in damage to the controller.
Following all the steps accurately during the reassembly process is crucial to prevent any potential damage to the controller. A well-assembled controller will not only ensure optimal performance but also contribute to an enhanced gaming experience overall.
Read Also How to Play Just Dance on Xbox One Best Method ⬅️
Testing and Calibrating the New Joystick
Now that you have completed the replacement and reassembly process, it’s time to test the new joystick. Connect your controller to your Xbox One console and navigate through the menu to check its functionality.[How to Replace Xbox One Joystick]
If the new joystick is working correctly, then you’re good to go. However, if you encounter any issues, you may need to calibrate the joystick.
Calibrating the joystick involves adjusting its sensitivity and dead zones. This can be done through the Xbox One’s settings menu. Simply follow the on-screen instructions to accurately calibrate your joystick and ensure optimal performance.

Troubleshooting Tips
In some cases, you may encounter issues during or after the replacement process. Common issues include unresponsive buttons or an unstable joystick.
If you experience any of these problems, it’s important to double-check your installation process to ensure that everything is in place and properly connected.
If the issues persist, it may be necessary to seek professional assistance or turn to additional resources such as online forums and tutorial videos. These resources can provide more in-depth guidance and specific solutions to address your particular issue.
Read Also How to Play Just Dance on Xbox Series X Easy Way ⬅️
Conclusion
Replacing the joystick on your Xbox One controller is a straightforward process that can significantly improve your gaming experience. By following the steps outlined in this guide, you can easily replace your joystick and restore your controller to its former glory.
So, don’t let a faulty joystick hinder your gaming prowess. Take action today, replace your joystick, and elevate your gaming experience to new heights.
How to Replace Xbox One Joystick – FAQs
Q1: What are some common issues that may require a joystick replacement?
Some common issues that may require a joystick replacement include drifting, where the joystick moves without any input, and stickiness, where the joystick doesn’t return to its neutral position.
Q2: What tools do I need to replace the Xbox One joystick?
To replace the Xbox One joystick, you will need a T8 Torx security screwdriver, a pry tool, and a replacement joystick module.
Q3: How do I remove the old joystick from the Xbox One controller?
To remove the old joystick, you need to unscrew the module and gently lift it off the controller. Be cautious to avoid damaging surrounding components.
Q4: How do I test and calibrate the new joystick after replacement?
Connect your controller to your Xbox One console and navigate through the menu to test the functionality of the new joystick. If any issues arise, you can calibrate the joystick through the Xbox One’s settings menu.
3 thoughts on “How to Replace Xbox One Joystick Free Way ⬅️”